It is often necessary to add custom styling to your Shopify theme. If you add it to your theme.scss.liquid and the theme is updated you will lose all of your changes. So we create a new SCSS file to keep all the custom styles nice and safe as well as much easier to edit.
1. Create a new asset for CSS styling: custom.scss.liquid
This is where we are going to put all our custom CSS styles
2. Connect new asset to the theme
We need to link to theme.liquid so the custom styles show on our website
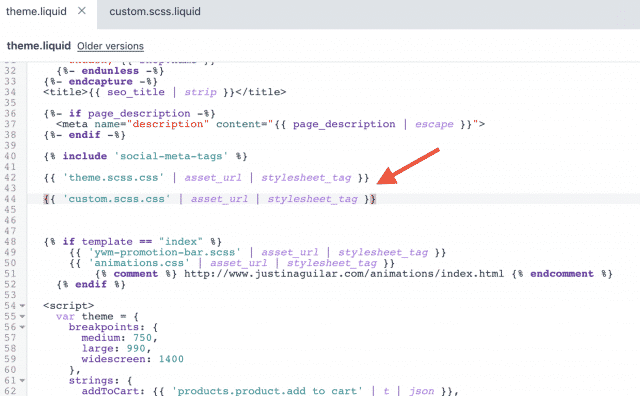
Go to Layout > theme.liquid and scroll down until you see
{{ 'theme.scss.css' | asset_url | stylesheet_tag }}
Underneath this add
{{ 'custom.scss.css' | asset_url | stylesheet_tag }}
3. Testing our CSS styles
Now let’s add some custom CSS to check everything is working correctly. I always like to check by changing the background to red so it’s nice and easy to see that our CSS is working:
body {background: red;}
4. Preview the CSS changes
Go and preview the website. You can see there’s a red background on the website which means now anything that we modify inside the custom CSS is going to make modifications to our website
(insert image red-background)
* Don’t forget to remove the background code we added and then you are ready to style your website – have fun!