- Log into the back end of your website.
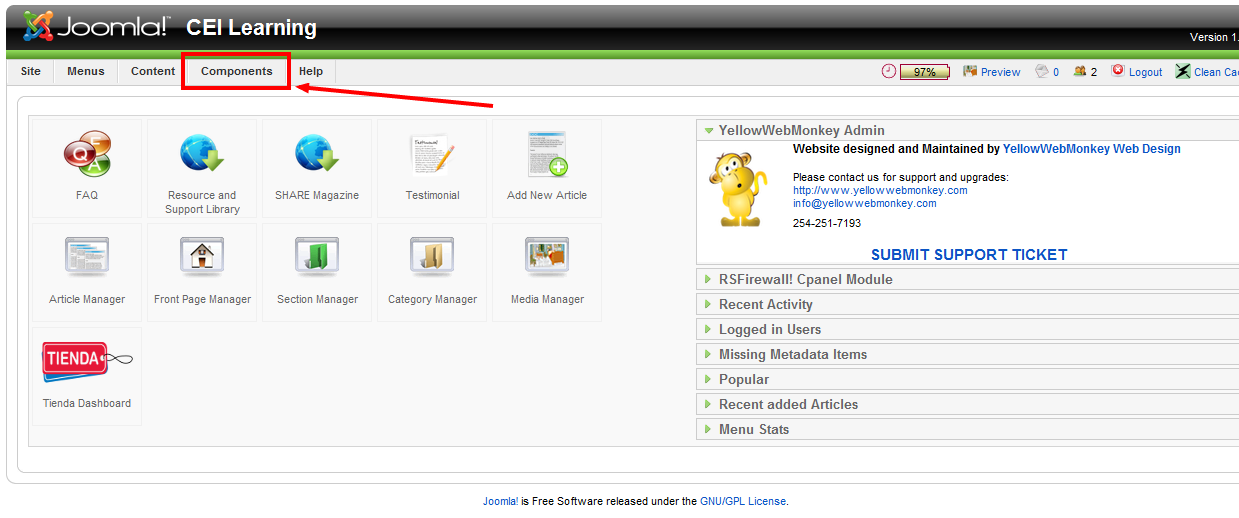
- Go to the components tab and select “Zoo.”
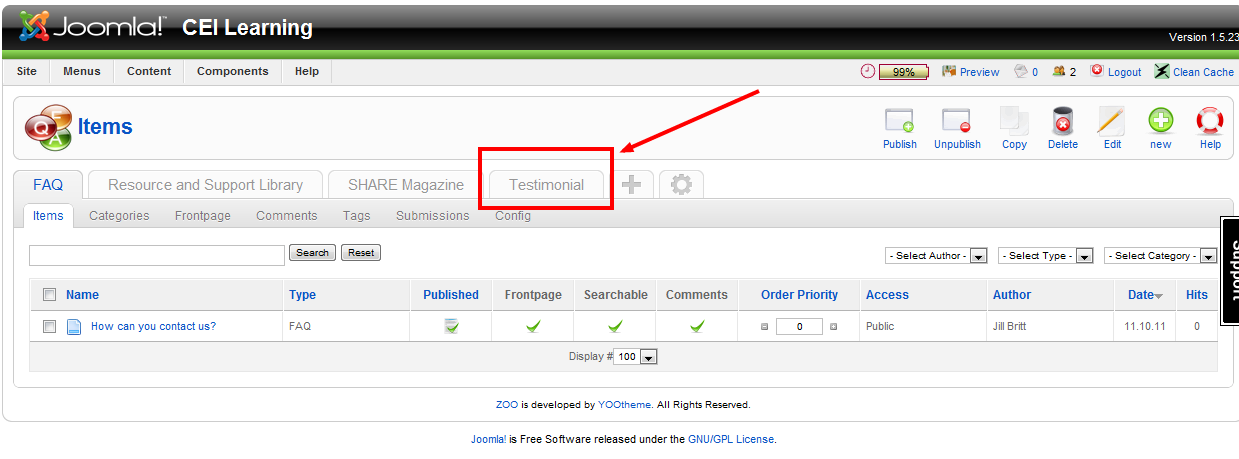
- Once in Zoo, select the “Testimonial” Tab.
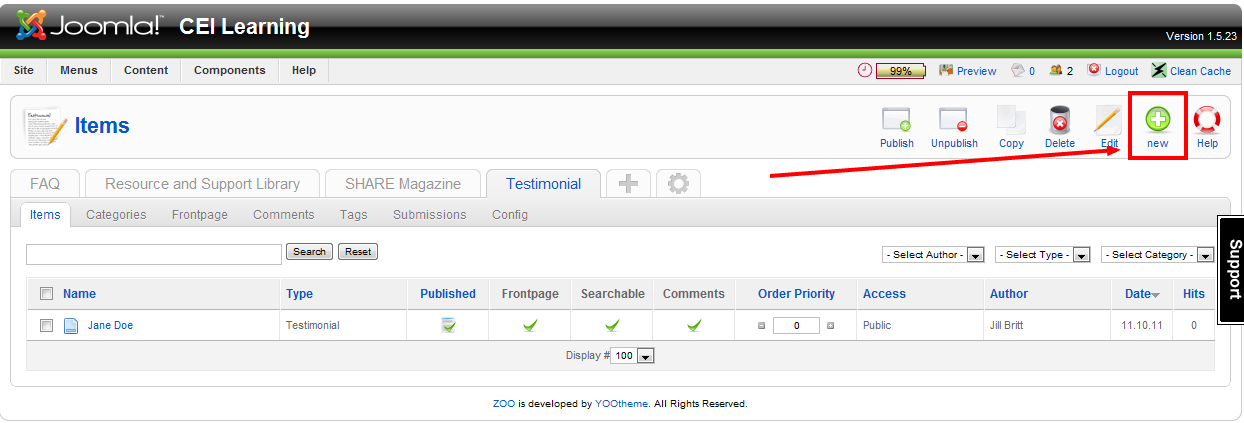
- When in the testimonial tab, select “New” in the top right hand corner.
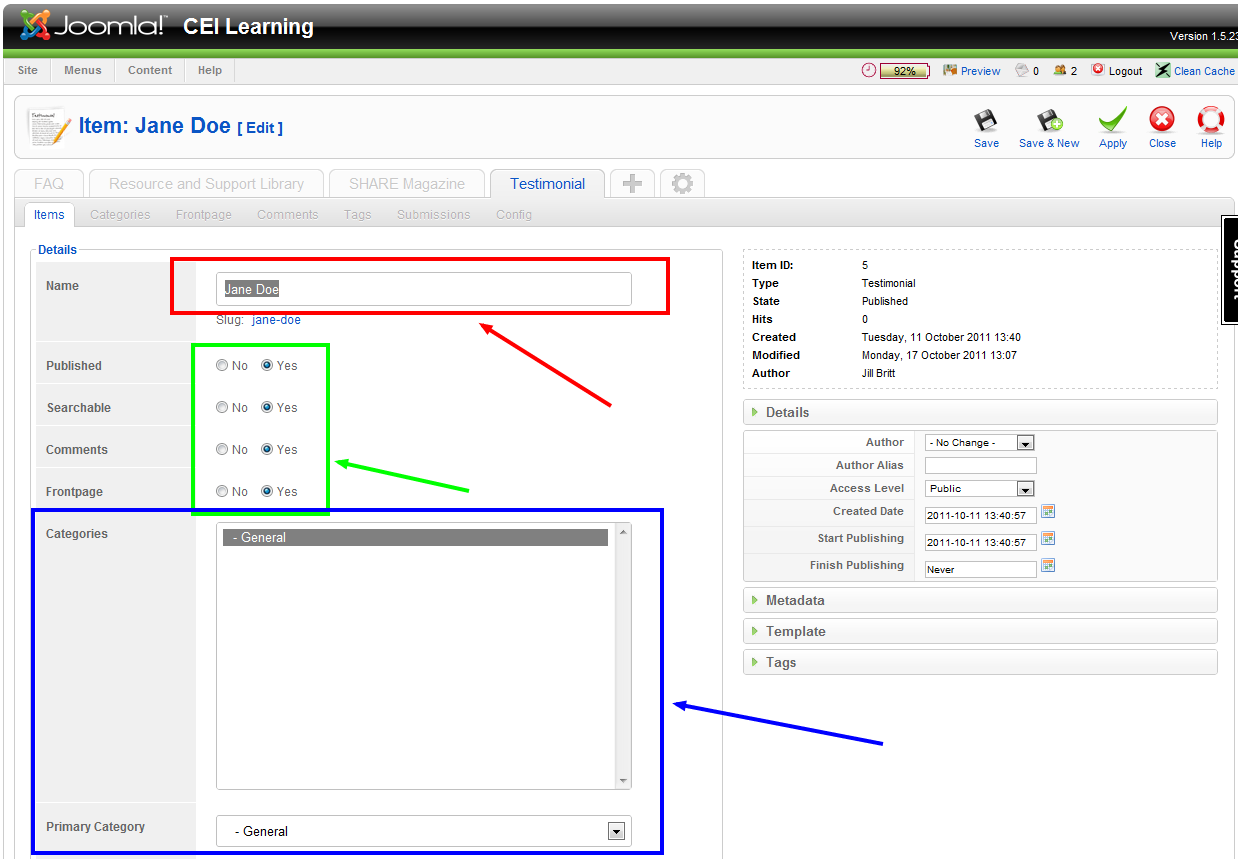
- Enter the name of the person who gave the testimonial.
- Make sure to check the “Publish,” and “Frontpage,” icons (This will ensure your testimonial is visible on the testimonial page.)
- Place the testimonial in the General category (or other specified category.)
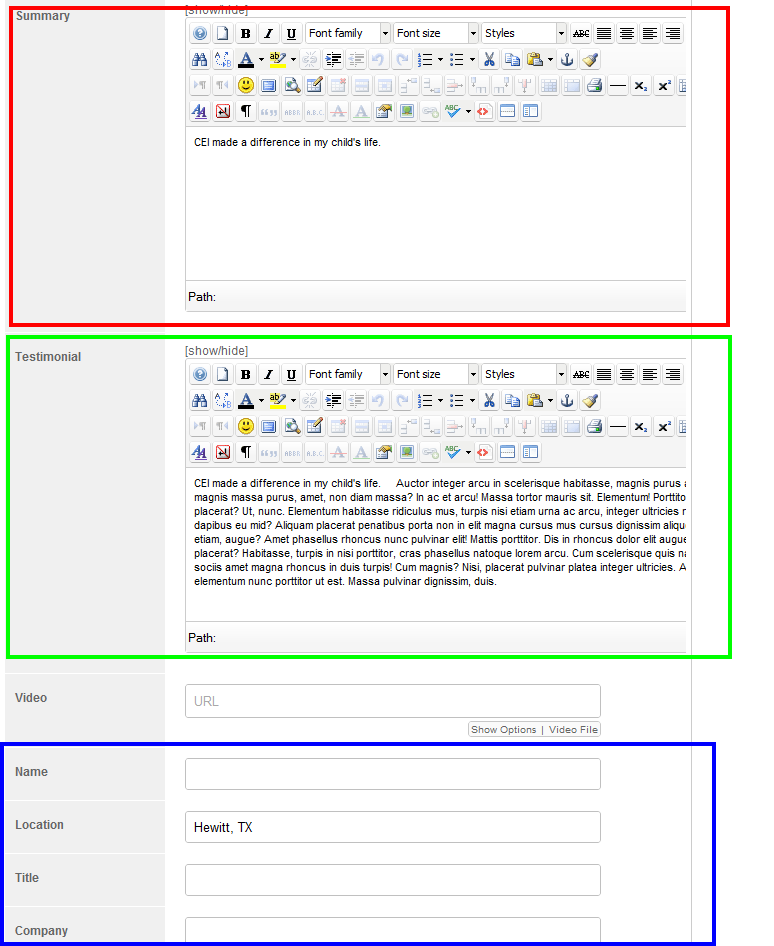
- In the summary section add the first line of the testimonial (This will serve as a preview on the main page).
- In the Testimonial Section insert the entire testimonial text.
- In the last columns, fill in the proper information related to the testimonial giver.
- Scroll back to the top of the page and click “Save and Close,” your testimonial will then be uploaded.