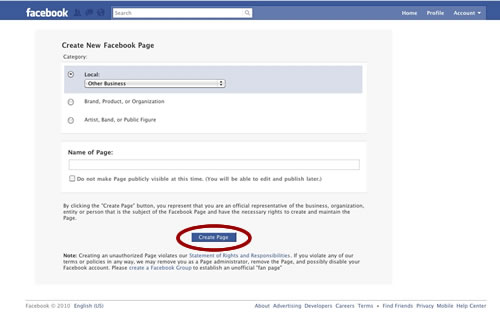
1. Go to http://www.facebook.com/pages/create.php
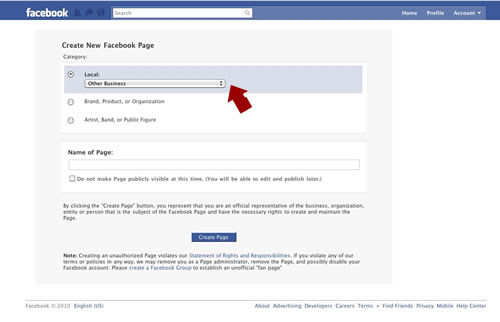
2. Select your type of business under LOCAL dropdown.
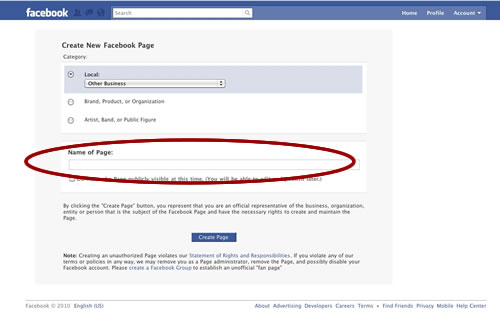
3. Type the title of your business.
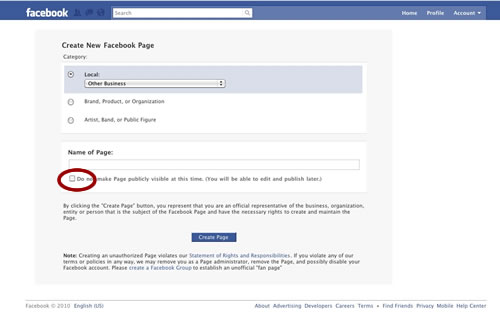
4. Click the checkbox next to “Do not make page visible at this time.”
5. Hit the CREATE Page button.
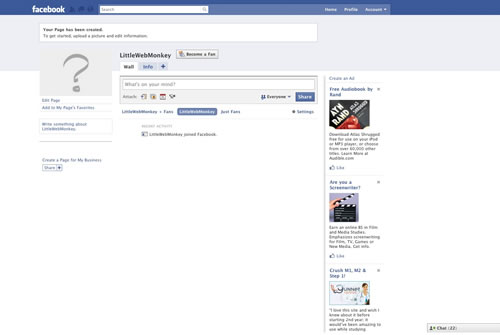
6. Your new page is created.
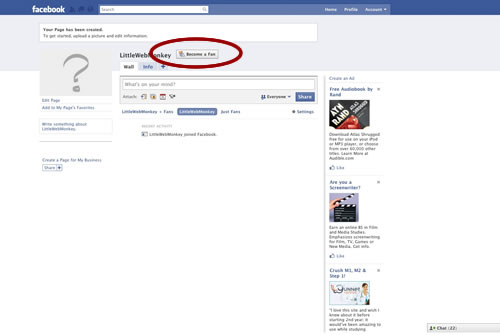
7. BECOME A FAN of your page (** Very Important)
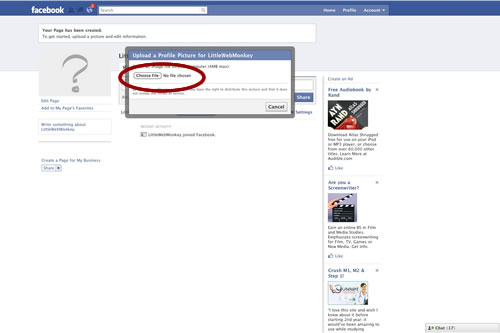
8. Move your mouse over the pic question mark. Click on the CHANGE PICTURE that pops up. Choose UPLOAD PICTURE.

9. Select picture from your computer and hit OK.
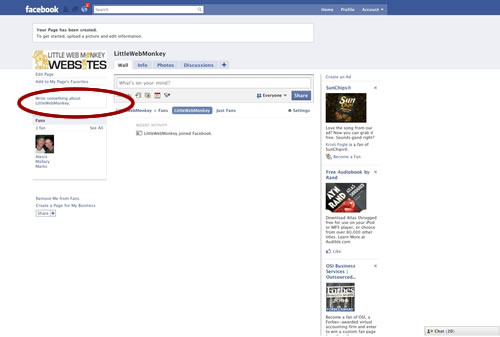
10. Click on the line “Write something about…” Add a quick note (website, phone number, slogan)
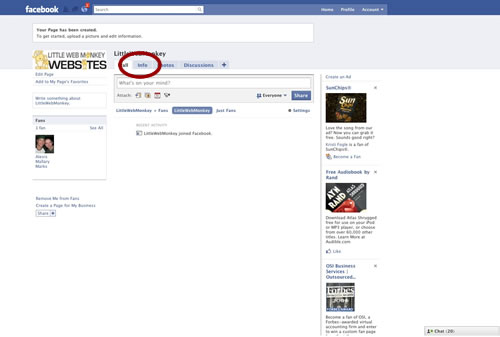
11. Click on the INFO Tab.
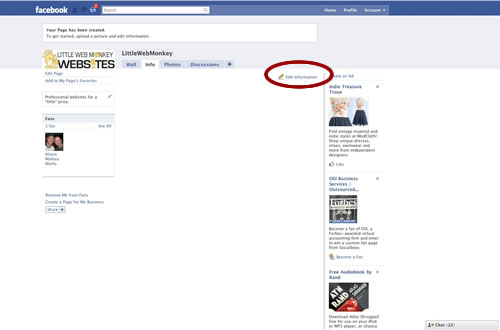
12. Click on EDIT INFORMATION.
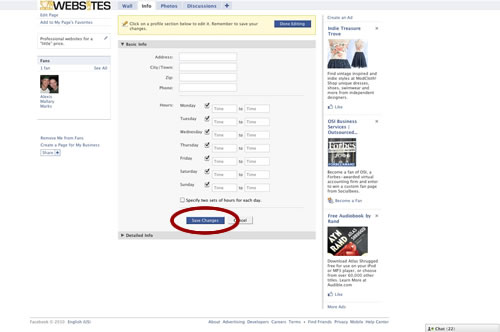
13. Fill in the form blocks. Click SAVE CHANGES.
14. Click on DETAILED INFO.
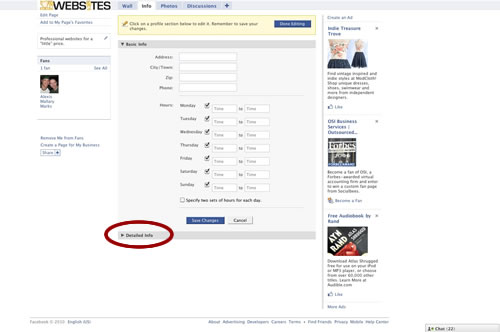
15. Fill in the form blocks. Click SAVE CHANGES.
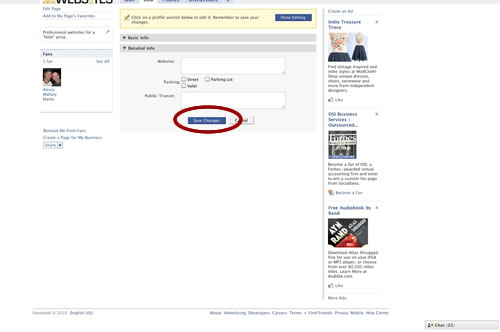
16. Click on DONE EDITING.
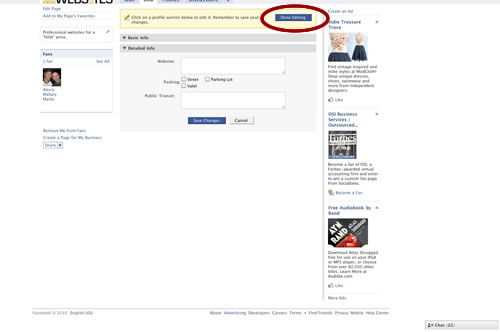
17. Click on PUBLISH THIS PAGE.
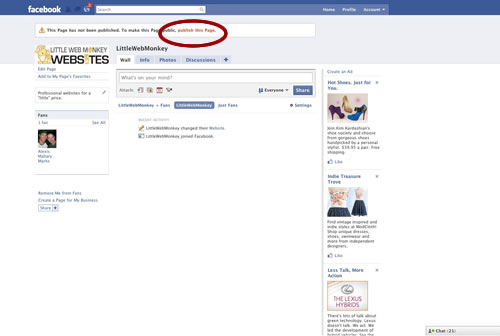
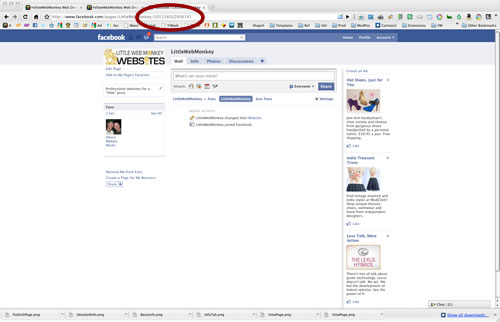
18. To get your Facebook ID for your business page, look at the address bar and copy the number. You may need to give this number to your web designer. Make sure you bookmark your page to make it easier to return to.
19. If this tutorial has been helpful, please click on the link and become a fan of YellowWebMonkey Web Design. http://www.facebook.com/pages/YellowWebMonkeycom/42637069836?ref=ts